The series of “Physical Tests” are designed to answer that very question. We know the importance of consistency in appearance and take all measures necessary to deliver the exact product being requested.
Pi Tape
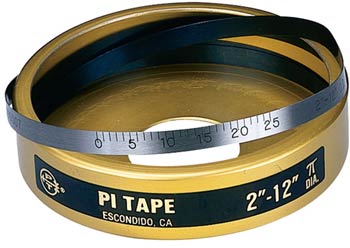 Circumference tape used to measure the overall diameter of jacketed cable over 0.180” with a resolution to 0.010”. A micrometer is a very accurate piece of measuring equipment and anyone who's spent some time in a lab probably knows how to use one. Generally speaking it's the tool of choice for accurately measuring the size of small parts. When it comes to measuring a cable though, you can leave it on the shelf. When we measure cables we are primarily interested in overall diameter and since a cable isn't perfectly round, trying to accomplish the task with a micrometer will only leave you frustrated. That's where a PI® Tape comes into play. Sometimes something that may look lower tech may also quite simply be the right tool for the job.
Video Optical Microscope
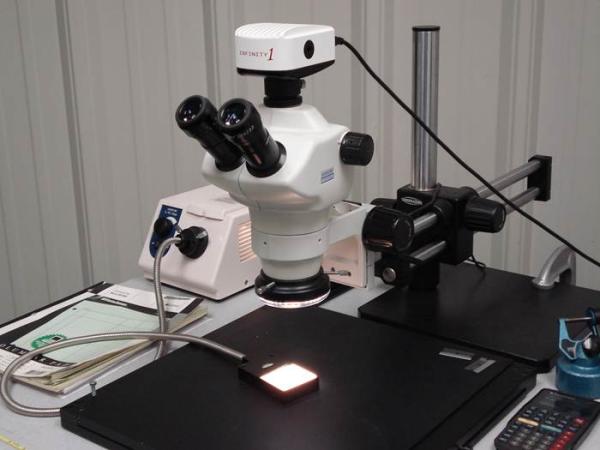
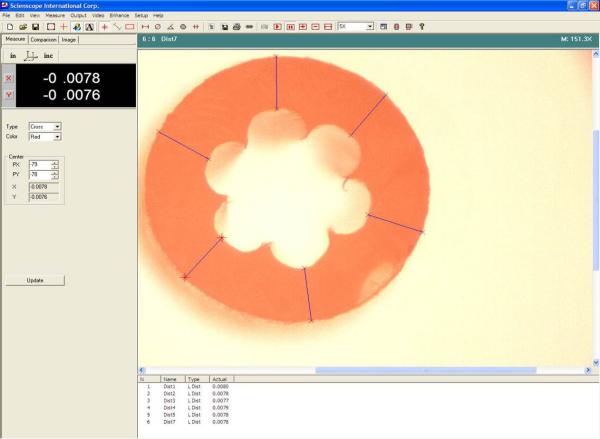
Quabbin uses a video optical microscope with a digital readout, resolution to 0.0005” and direct data download capability. What does this do for us? For starters it's a lot easier to view the sample on the computer screen than through the eye pieces of a conventional microscope, but that's just the start. When comparing two samples together samples don't have to be continuously re-mounted on the microscope because the images have been captured on the P.C. This saves time when switching back and forth between samples. Further, the microscope software and the computer take vary accurate measurements which are not only precise but also easily stored in electronic file for future reference. The photos below depict measuring the wall thickness of the primary insulation of a data cable. It's important that the copper conductor be located as close to the center of the insulation as possible giving the insulation wall the same relative thickness all the way around the conductor. The photo shows six blue lines superimposed on the insulation sample. Measurements are found on the left. Since this specimen is from a stranded cable, you will also notice the “flower” pattern of the opening in the center of the insulation. The flower pattern is generated by the individual strands in the copper conductor.
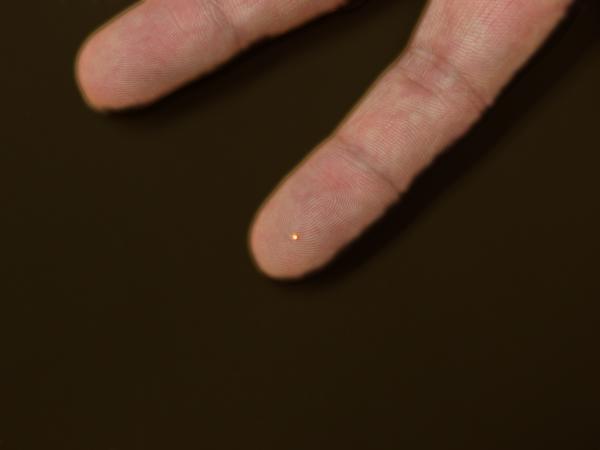
Pictures below show a) the actual video optical microscope b) A sample of the inner conductor as seen with the naked eye c) The same sample being seen using the video optical microscope.
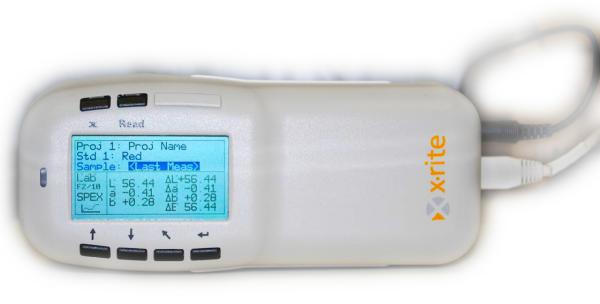
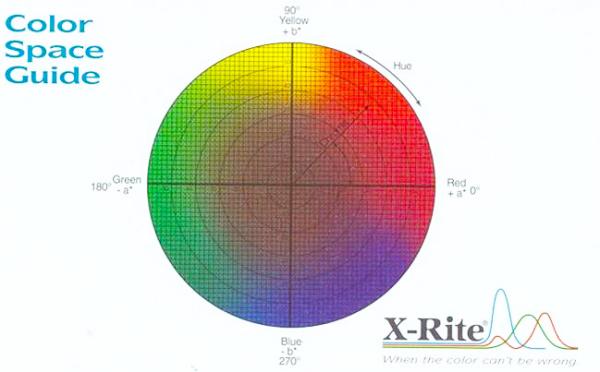
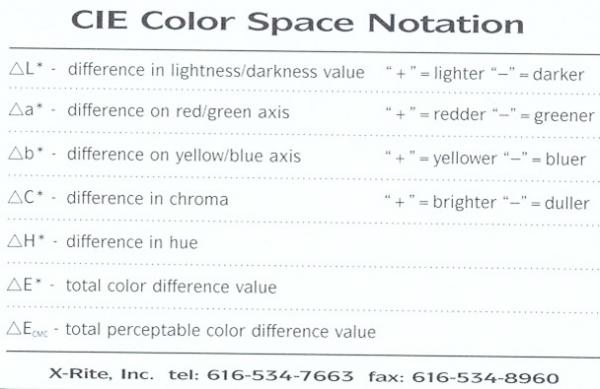
In order to test the samples to verify the match, a hand held measuring device is used. (see below) The hand held is positioned over the sample in the light box and a reading is taken. The information is then forwarded to the P.C. where it can be plotted into a four quadrant representation of the color spectrum. The center of the circular graph is the theoretical “bull's eye” and if the reading lands in an outlying quadrant it may or may not be close enough. There is usually a circle in the graph and any points inside the circle are considered a match and those outside are considered too far away from the goal. Depending on the acceptable tolerance the size of the circle or “acceptable range” may vary. The best part about this piece of lab gear is that it can be calibrated to match another similar piece of gear at the customer site if they also have one. This can be done even when the two devices are on opposite sides of the country. Imagine the confidence this creates. With or without the second unit at a customer site, rest assured a spectrophotometer is the best way to match a color and Quabbin has the capability.
Xrite® Color Spectrophotometer
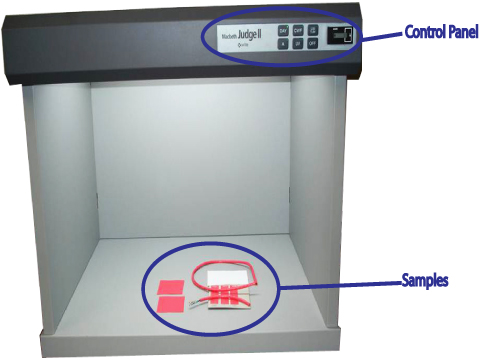 A spectrophotometer is used for color matching. The days of trying to eyeball Pantone® Swatches are a thing of the past at Quabbin. Instead we've gone high tech. with the highest level of accuracy available in the market. Consistency and repeatability are critical to a color match. The first step of the process is to standardize the light type. Think about it, samples can be viewed in daylight, incandescent light or fluorescent light and under each lighting scenario the sample can appear to be a slightly different shade. Without controlling the lighting conditions, don't expect to get a repeatable match. The solution to this is a light box (pictured below). A light box provides a controlled environment because it is closed off on all sides with the exception of the viewing/working side. Further, it will provide illumination that can simulate any of the three different lighting types at the push of a button. The next thing you need is a set of samples. As can be seen in the photo, there are several samples of red inside the light box. Some of the samples are cable and some are flat squares of red material called plaques. Plaques are generally used by color concentrate manufacturers who sell their concentrate to more than just cable companies. When we ask for a color sample of their concentrate they don't send us a piece of cable, they send us a plaque. Occasionally, some of our customers may be trying to match our cable to their other components, like a boot or a custom rack, etc. If they have the capability, they may also send us a plaque instead of the actual piece of equipment they're trying to match. In this photo is a set of plaques from the concentrate manufacturer, a set of plaques from our customer and the completed color matched cable, fresh from our plant.
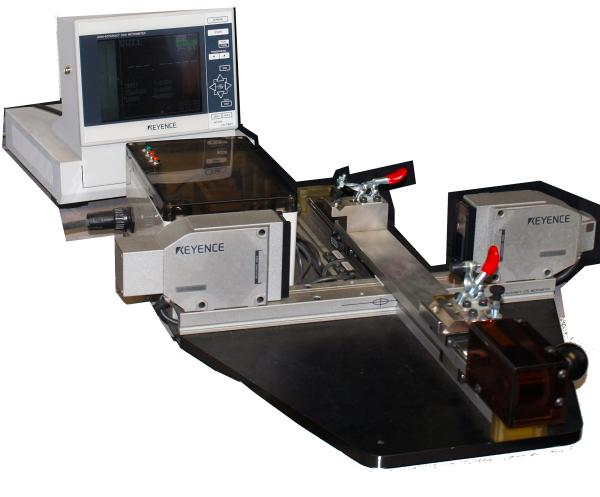
Keyence® Optical Gauge
Non-contact L.E.D. optical gauge used for diameter measurement of copper conductor at incoming inspection. Resolution to 0.00001”.

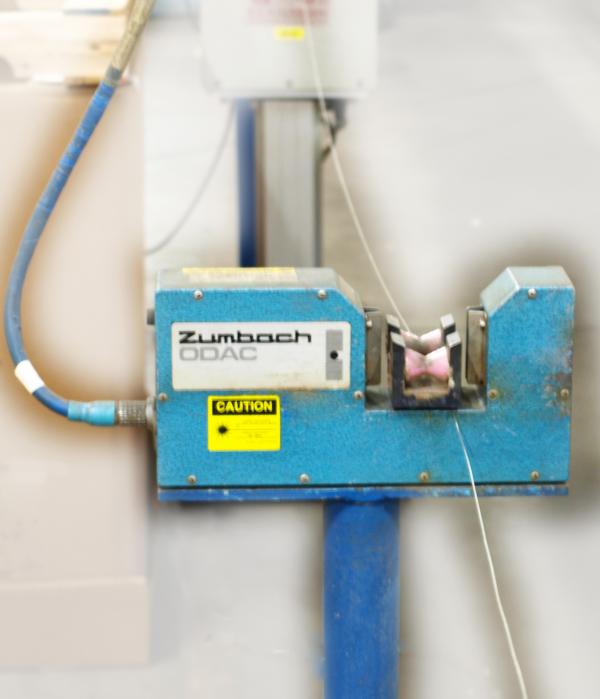
Inline Measurements
Zumbach® laser micrometer; Beta® concentricity, SRL and capacitance monitors.
UL VW-1 Vertical Wire Flame Test
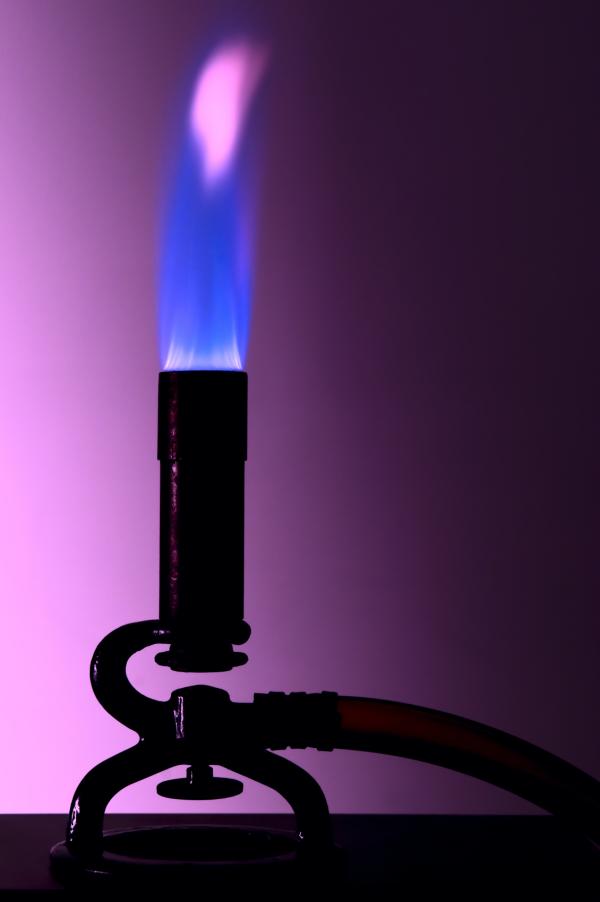 The purpose of the UL VW-1 Wire Flame Test is to determine the flammability/flame retardant properties of cables. The ignition source is a flame generated by a device similar to a Bunsen burner. The wire sample is mounted in a protective chamber and the flame is applied for 15 seconds and then removed. The flame is then reapplied, either after 15 seconds or immediately after the flame on the sample self-extinguishes (whichever is longer). In order to pass this test the cable sample must self-extinguish within 60 seconds. Furthermore, the sample must not burn more than 25% of the Kraft indicator flag at the top and the surgical cotton at the base must not be ignited. This procedure is repeated five consecutive times for a total direct exposure to the burner of 75 seconds.
This video shows in house pre-testing being performed on a cable sample prior to submission to a regulatory lab. Towards the top of the cable is a light colored mark which represents the indicator flag. As you can see, by the second application of the flame the cable jacket has charred and hardened around the cable core. This is the desired affect from a flame retardant cable jacket. A failing test would usually show the cable jacket dripping away and exposing the c able core which essentially amounts to more fuel for the fire. However, when the cable jacket chars and hardens around the cable core, it protects the core for ignition by limiting the fuel available to feed the flame. Clearly noticeable in the video, subsequent applications of the flame self-extinguish even faster due to the lack of available fuel.
Moisture Monitoring
Sartorius MA100H Moisture Analyzer - Here at Quabbin we use a gravimetric moisture monitor to test every batch of plastic that goes into our wire. With a gravimetric analysis we get super accurate and most importantly quick results unachievable by other methods. For years the gold standard in moisture measurement was Karl Fischer Titration, but due to the complexity of its execution and time required to complete the test, it is not feasible to conduct for every batch of plastic that enters our warehouse. Unlike the titration which is a direct method, the gravimetric method is indirect and involves drying the sample. The analyzer takes the weight of the plastic before and after drying, and measures the moisture removed by the weight loss of the sample. Both methods are highly accurate and are best used to measure moisture in samples containing <1% water, though the test can be accurate on samples containing ≥0.01%. Controlling the moisture content of the plastic is imperative to creating a consistent product as too much moisture can lead to increased viscosity and porosity, resulting in the eventual failure of the wire. The benefits of being able to test frequently is twofold; we are able to identify and correct weaknesses in our manufacturing process and increase the efficiency of our drying procedure by fine tuning dry times and Desiccant replacement.
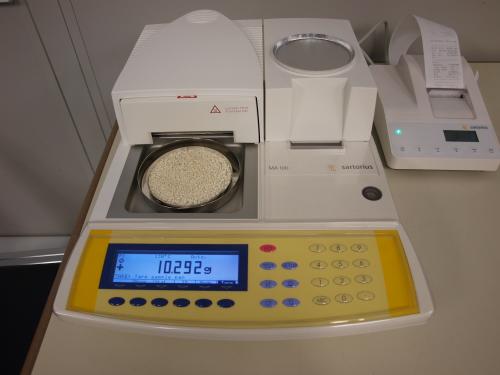 This picture shows the device with the drying chamber open. Inside we see the plastic pellets on its metal tray. When the test starts the white door slides over the metal tray and the drying process begins. the machine automaticallt records the weight and displays it on both the digital display and in a printout form from the subunit to the right